

What happens after someone clicks through to your offer? Where do they go after opting in, buying, leaving, or deciding they need more information? Sales process mapping puts those actions and decisions in one picture so your team can discuss the same route.
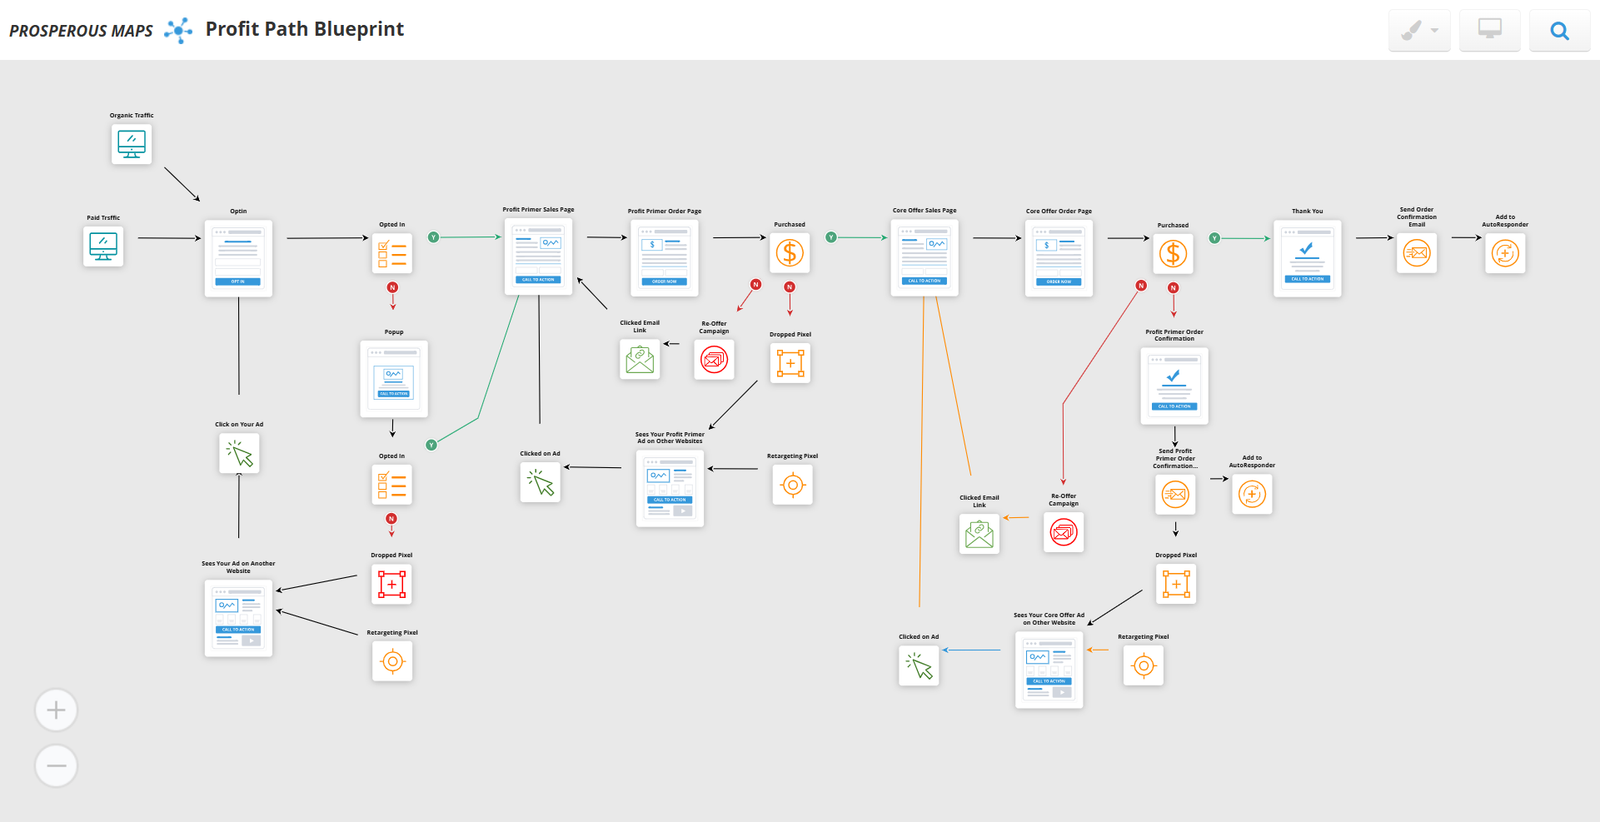
The Profit Path Blueprint provides a guide through five stages: Traffic & Opt-In, Profit Path Primer, Retargeting Loop, Core Offer Sale, and Confirmation & Follow-Up. Use it to examine the path from first click to follow-up, then adapt the map to the work your business actually does.
This is a focused acquisition, offer, and follow-up framework. It does not need to represent every sales activity or internal workflow to be useful.
Start with the process your team actually follows
Before drawing a better process, record the current one. Include the pages people visit, the actions they take, the messages they receive, and the points where someone on your team needs to take responsibility. If people describe a handoff differently, mark that difference for discussion rather than choosing the tidiest answer.
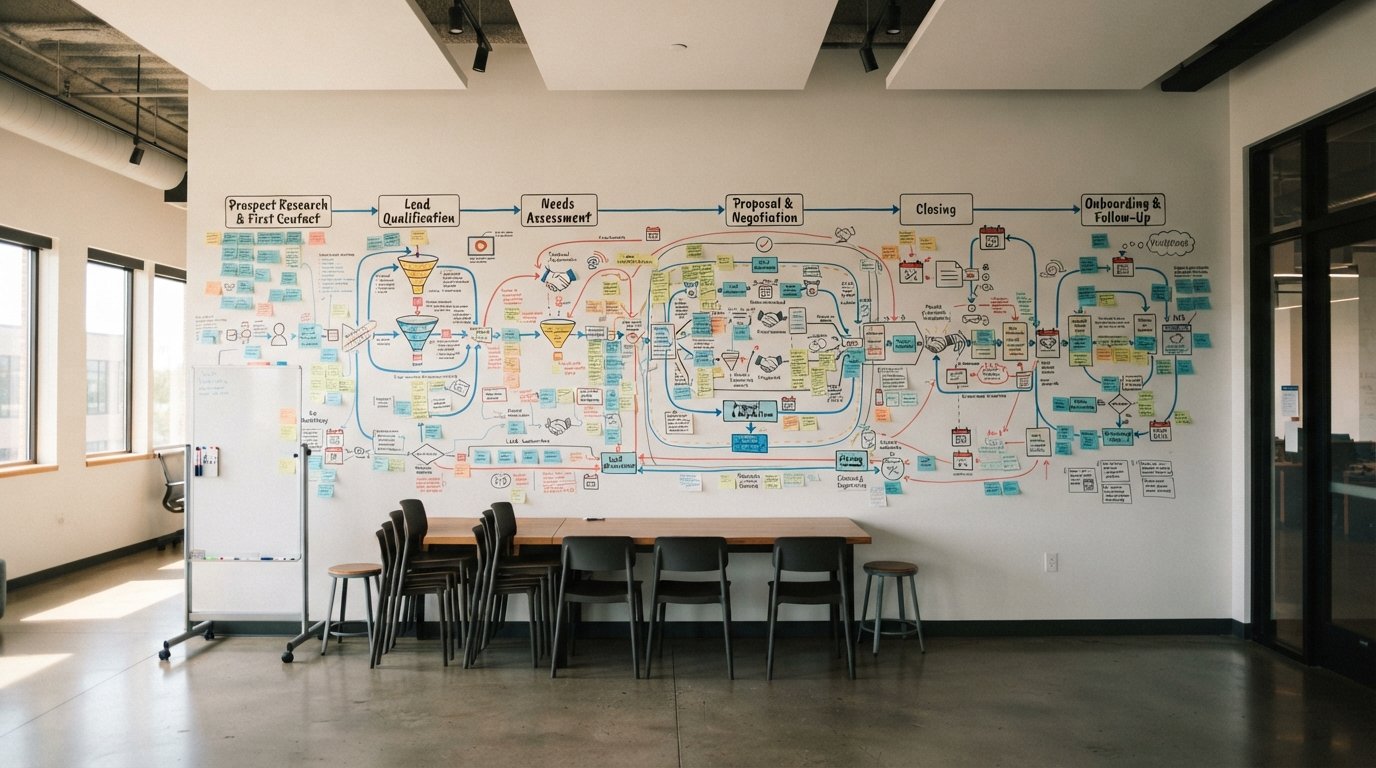
Personally, I find it helpful to have a visual representation of the complete sales process. I can look at the whole route, from first click to follow-up, and then examine a particular part in more detail.
That matters for team members and contractors too. They need to understand their portion of the overall system and how it connects to what happens before and afterward. For me, the useful starting point is a core structure that shows what’s involved, with enough detail for the people doing the work.
Key takeaways
- Use the Profit Path Blueprint’s five stages as a guide, then document your actual route.
- Keep buyer actions separate from the internal responsibilities that support them.
- At each handoff, record who sends, who accepts, what information travels, and what triggers the transfer.
- Show return paths and different follow-up for buyers and nonbuyers.
- Review a real prospect path with the people involved before adopting proposed changes.
1. Traffic & Opt-In: map the entry path
Start with the traffic source and follow the prospect through the entry path. That may include an offer page, a form, a thank-you step, email confirmation when needed, and access to the promised deliverable.
The Blueprint’s opt-in guidance focuses on action. A page view alone does not show that someone completed the intended path. Check what the prospect needs to do and what confirms that the promised item reached them.
For your own map, answer these questions:
- Where does the prospect arrive, and what are they being offered?
- What counts as a completed opt-in in this process?
- Who checks the page, form, confirmation, and deliverable?
- What information does the next responsible person receive?
A completed opt-in and a sales-qualified lead are different decisions. Define your own sales qualification criteria rather than treating a form submission as proof that someone is ready to buy.

2. Profit Path Primer: connect the first paid step
The Profit Path Primer is the first paid offer after the lead magnet. The point is continuity: the offer should relate to the original problem and help the buyer take the next practical step without pretending to solve everything.
Record what the buyer receives, how purchase completion is confirmed, and what changes afterward. Does someone need to provide access? Does the buyer move into a different follow-up group? Who checks that those steps happen?
If your business does not have a first paid offer, map the route it actually uses. A guide should help you see your process, not pressure you to invent an offer to fill a box.
3. Retargeting Loop: show the return paths
Some people leave without taking the intended action. Others opt in or buy and need a different next message. The Retargeting Loop asks you to distinguish those situations.
The Blueprint separates visitors, leads, buyers, and customers when considering inclusion and exclusion. Use that distinction to document who a reminder is intended for and which completed action should remove someone from that particular message.
Ask what happens after a no, an incomplete purchase, or a return visit. Show the relevant branch and where it rejoins the process. If the next action is unclear, leave it as an unresolved decision for the team.
Keep this stage focused on planning the appropriate message and audience. Check the applicable privacy and platform requirements before putting a retargeting workflow into operation.
4. Core Offer Sale: clarify the main decision
At the main offer, the buyer needs a clear account of what they will receive, who the offer is for, who it is not for, how to get help, and which policies affect the purchase.
Map the path from the offer to checkout or the next sales conversation. Identify who supplies or confirms the information the buyer needs. Use the actual scope, proof, price, and policies for your offer; do not fill missing information with assumptions.
Keep the buyer’s decision separate from the internal handoff. For example, a buyer may agree to a conversation while a team member still needs to send context to the person taking that conversation. Those are two actions, and each needs a clear owner.
5. Confirmation & Follow-Up: make the next responsibility visible
After the purchase, confirm the correct order, access or delivery details, and support route. Then check which follow-up the buyer should receive.
The Blueprint’s guidance distinguishes buyer and nonbuyer messages. Someone who already purchased should not continue receiving the same promotion as someone who has not. Record the action that changes their next message and who verifies that the change happened.
Keep timing specific to your business. Document the commitments your team actually makes rather than borrowing an arbitrary response deadline or email schedule.
Make sales and marketing handoffs explicit
As you work through the five stages, add the responsibilities that sit behind each buyer action. Use the following questions to document the handoffs specific to your team.
At every transfer, record:
- Sender: which role passes the lead, order, or request forward?
- Receiver: which role accepts responsibility for the next action?
- Context: what information must accompany the transfer?
- Trigger: what event starts the handoff?
- Exception: what happens if information is missing or the next step is declined?
For example, if your process includes a consultation request, you might record who checks the request, what context reaches the person taking the call, and what happens when essential information is missing. Adapt those questions to the process your team actually follows.
Test the map with a real path
Ask the people involved to walk through one documented prospect or purchase path together. Compare the map with the actions and messages that actually occurred. Where do accounts differ? Where did information stop? Which next step was left unclear?
For a B2B buying journey, ask whether your business needs additional stakeholder, approval, evaluation, or sales-conversation steps. Add them when they reflect the real process; do not assume the Blueprint’s five stages replace those activities.
Choose a format that makes the work understandable. A simple flowchart can show a route and its decisions. Separate role lanes may be useful when the main question is who takes responsibility as work crosses teams.
Keep proposed changes distinguishable from the current process. Record what you want to change, why, and what evidence you will examine after using the revised route.
When I can see the whole process, I can look for a step that might be simplified or a portion that might be worth automating. After putting a change into practice, I use the data from that work to make adjustments. Start with a specific action, decide what still needs personal attention, and check what happened after the change.

Questions to ask while adapting the Blueprint
Do I need to use every stage?
Document the route your business actually follows. If a stage does not apply, explain that choice rather than inventing an offer or workflow. Keep enough detail to show the next action and responsibility.
How much detail should the map contain?
Start with the core route. Add detail where someone needs it to understand a decision or carry out a handoff. If detailed instructions overwhelm the overview, keep them in a companion document connected to the relevant step.
What should we review after a change?
Review the evidence relevant to the problem you intended to address. That might include completed actions, time spent waiting, missed handoffs, or incorrect follow-up. Investigate the pattern before deciding what caused it.
Put one handoff into focus
Choose one point where a prospect, buyer, or request moves to a new responsibility. Write down the trigger, owner, required information, and next action. Review it with the people involved, then connect it to the wider route.
Subscribe to access the Strategy Library and use the Profit Path Blueprint to map your sales process.